Friday, February 6, 2015

Anti-VDay Conversation Hearts

Hey Y'all!
Here's another Anti-Valentines Day design. 
I was originally inspired by a post on pinterest about mean conversation hearts. I loved em and instantly had a design in my head, buuuut I don't think I executed it exactly how I imagined, but I still mostly like them. 

It's a mix of stampin and freehand. 
Here's how:
Start with a white base. I used Salon Perfect "Sugar Cube."

I used Bundle Monster stampin plate 317 with a heart design.
Have I said how stamp obsessed I've been?!

Then with Salon Perfect nail art liner "Green Stem,' I covered the plate. I could've used regular polish, but I was usin these for the end of the design anyways and I wanted em to match and wasn't sure how they'd do on the plate so that's why I covered the image instead of just the top. 

Then usin my creative shop scraper I scraped the polish off towards me. I find that easier, but you do whatever works best for you. 

Then pick up the image with your stamper. I use creative shop! 

and there's the image on the stamper.

Roll or push the image onto the nail. 

Clean your stamper with a piece of tape. Don't use acetone!

With a striper brush I filled in all the hearts with a correspondin color. I used Sally Hansen "Mint Sorbet," as my green. 

Continue to fill in all the hearts. 

With white and the same striper brush I went in and drew a larger heart in different places on the nail. 

Then outline the heart with the color you stamped in. 

and fill in your heart the same fill color.

Then with the stamp color go in and put a word like "Meh" or "Nah" or "Gag" or in the case of my green nail I did a flat line kind of design. 

Use your favorite top coat to seal it all in. I use Salon Perfect.

and that's it! There you have your Anti-VDay conversation hearts!
Here's the video:http://youtu.be/mZcs3RBopyY


I hope all you Anti's out there enjoyed this design! I know I definitely did. I'm not into Valentines Day in the first place, but even more so this year as I'm dealin with a bit of heartbreak. Doesn't mean I can't have a cute mani with an Anti Twist! 

If you get inpsired by me use my tag #MagsyInspired on instagram so I can see!

Happy Anti-VDay y'all!

Find Me Here Too:

~Maags


Thursday, February 5, 2015

Zoya Swatches

Hey Y'all!
Today I have swatches of my new Zoya's that finally after a month have arrived! 
So I got these durin the Zoya sale and the 3 mini's came free! 
I really love all of them! I know a lot of people are upset with the 3 mini's but I actually love them! They're all great formula and consistency and all in my neutral palette that I usually wear. 
Then I got to pick out my regular sized 3 and I went with "Brooke," "Payton" and "Haley," my 3 fave One Tree Hill girls! 

This is the first mini "Charlott."
It's a beautiful nude that is almost perfect in 1 coat! I used 2 just because. And sorry I bumped my pinky and didn't have time to fix it. The formula is great it just glides right onto the nail.

This is mini "Severine." A metallic green. It's good in 1 coat but perfect in 2. Again this just glides right onto the nail perfectly. It looks gold in most lights but is actually a very light olivey green.

This is my favorite of the mini's "Anais." It looks like a gorgeous black, but in the light it has a very dark olive green undertone! It's also a little metalic or shimmery under the surface. It's just stunnin! Really smooth again just glides right on. This is 2 coats but again was almost great in 1.

Now onto the 3 full size I picked.

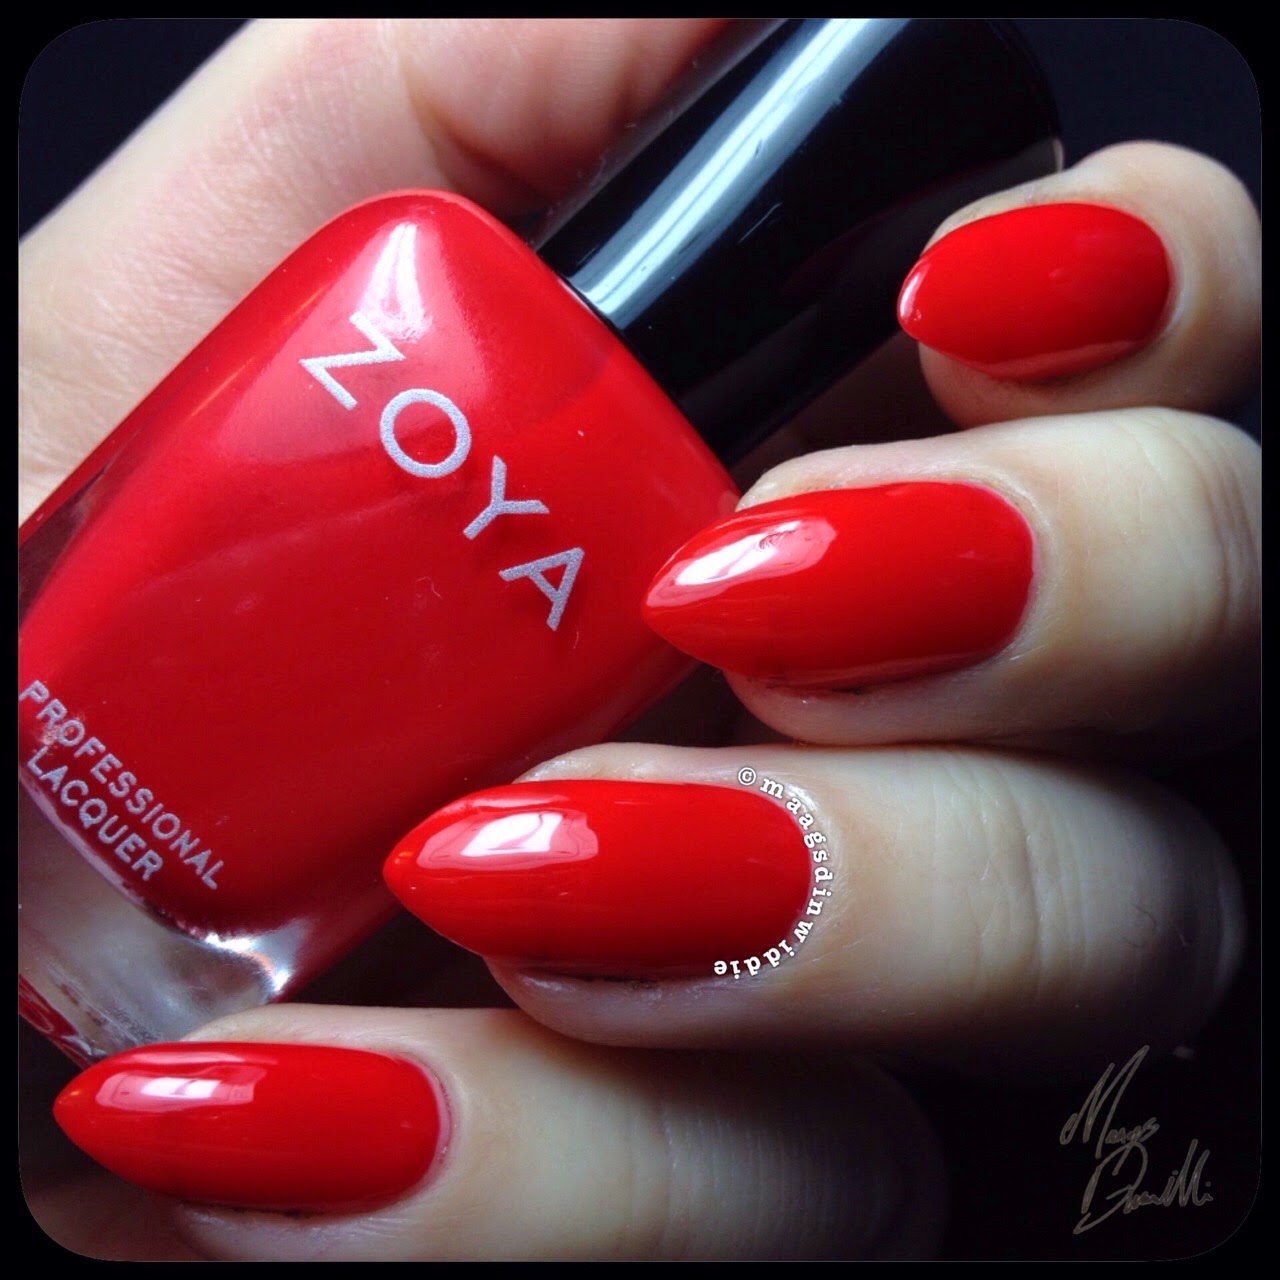
This is "Haley." Um I can't even explain how gorgeous this red is! It's probably one of the best red polishes ever made! This is 2 coats and you can still see through it a little bit but it's just stunnin! I usually don't like red polish these days because it's what nail school will shove down your throat as it's the color for the board testin, but this red is HOT! It totally reminds me of Haley from One Tree Hill, she's sexy, but classy and fiery and passionate! It's just perfect!

This is "Brooke." It's a hot pink/fuchsia shimmery polish. This is 2 coats and it's slightly still see through as well, but still gorgeous and buildable. This one surprised me because I wasn't sure I was gonna like this one even as I was buyin it, but I couldn't separate my girls Gol! I put this on and it's soooooo smooth and not streaky at all! The first coat was way more pigmented than I thought it would be. This is totally Brooke! It's flashy and hot and sexy and in your face and bold and strong, just like her!

This is "Payton." When I put this on I almost literally couldn't breathe because of it's sheer gorgeousness! This color is beyond any color that I own! I am not a purple person, I mean it has to be a special purple for me to like it, and this is SPECIAL! This is 2 coats, but if you're careful you can get away with 1 coat! This is truly amazin! It's juicy and sparkly, yet refined and classy. I am defnitely going to be wearin this as a full mani probably this weekend! I seriously can't believe I have never heard of or seen this polish before it should have way more hype around it because it's really one of the greats! This one again goes with Payton in my eyes. It's dark like her soul gol and glitzy but not in your face. It's beautiful and classy and strong as well. It's definitely a statement piece and I feel that's her with her art. 

I am so glad I got the colors I picked and that I just happened to be on a One Tree Hill kick the night I purchased. All of these are beautiful and I definitely recommend these! I don't have many Zoya's but now that's to the sale I have 6 new beauties! Definitely take advantage of any sale Zoya does, waitin for a month to get them wasn't fun but the outcome was worth it! 

Hope y'all enjoyed this and that some of you got to take part in this sale!

Find Me Here Too:

~Maags

Wednesday, February 4, 2015

Sexy Valentine Outline

Hey Y'all!
Here's my first valentine design, and about as girly and lovey dovey as it's gonna get around here. 
I have never been one to love valentines day let alone I'm goin through a blah moment with love sooooo let's just say things around here are gonna be more on the dark side and anti-valentines. 

Here's how:
Start with a red base. I used Zoya "Haley" which is soooo amazin! Two coats of silky, sexy, red!

Then I used Born Pretty Store stampin plate BP-L007 with a heart like vintage design. The middle design in the corner of the photo.

I stamped in white. Salon Perfect "Sugar Cube." I place some white at the top of the design.

Then scrape towards me with my creative shop scraper. Scrapin towards me is the easiest I've found.

Pick up the image with your stamper, mine is creative shop.

There's the image.

Just press or roll the stamper onto your nail.

And here's the image on the nail.

Use some tape to remove the remainin polish on the stamper. Do not use acetone.

Then usin Salon Perfect nail art liner in "Black Ink," create an outline around your whole nail.

Closeup of the outline. This is the true color of the red. It's just beautiful and I love it!

Use your favorite top coat to seal it all in. I use Salon Perfect. 

And that's it! 
Here's the video:


I really love this design! I have been wantin to do outlinin again ever since my bestie twin nails with (Whimsicalicious). Also when I was done with this design I realized it reminded me of my twilight dvd case! Breaking Dawn pt.1 came in a valentine "Be My Vampire" case and it looked just like the red and white stamp on my nail. I love that it's vampy and a little dark. 
I hope y'all enjoyed this one and if ya get inspired by me use my tag #MagsyInspired so I can see. 

Until next time!

Find Me Here Too:

~Maags 


Monday, February 2, 2015

Born Pretty Store Sticker Review/Demo

Hey Y'all!
Today I have a quick demo review for the Born Pretty Store!

It is some gold nail stickers. 

Here's the demo:
I started with a white base. Don't you just love the look of a fresh white canvas!?!
I used Salon Perfect "Sugar Cube."

This is the sheet of stickers. It's a big sheet for around $3. I'll be usin a heart design for Valentines Day.

You just peel it up off the sheet and place it onto your nail just like a regular sticker. Make sure your base is completely dry so if you need to reposition you can.

They're so beautiful and shiny!

Then top coat them. It says to use two layers of top coat but I only used 1 and they're pretty smooth. I use Salon Perfect Top Coat.

And there's the full design! 

Also I have a 10% off code for y'all! If  3 people use it we can have a giveaway on my Youtube channel! 


I really love these stickers. The smaller designs like these are so fun to just enhance a design. There is bigger ones as well which I feel might be a little big for a full nail design but I'm sure you could cut them down to fit. They're very shiny and beautiful! You have to be a tiny bit careful as you can rip em while peelin them up but I only ripped 2 out of 8 so not too bad. 
Here's the link to born pretty: http://www.bornprettystore.com

Hope y'all enjoyed this and will checkout some of their products! I really have loved everythin from them so far! 

Find Me Here Too:

~Maags